By Sarah Mastrangelo and Hae Min Park

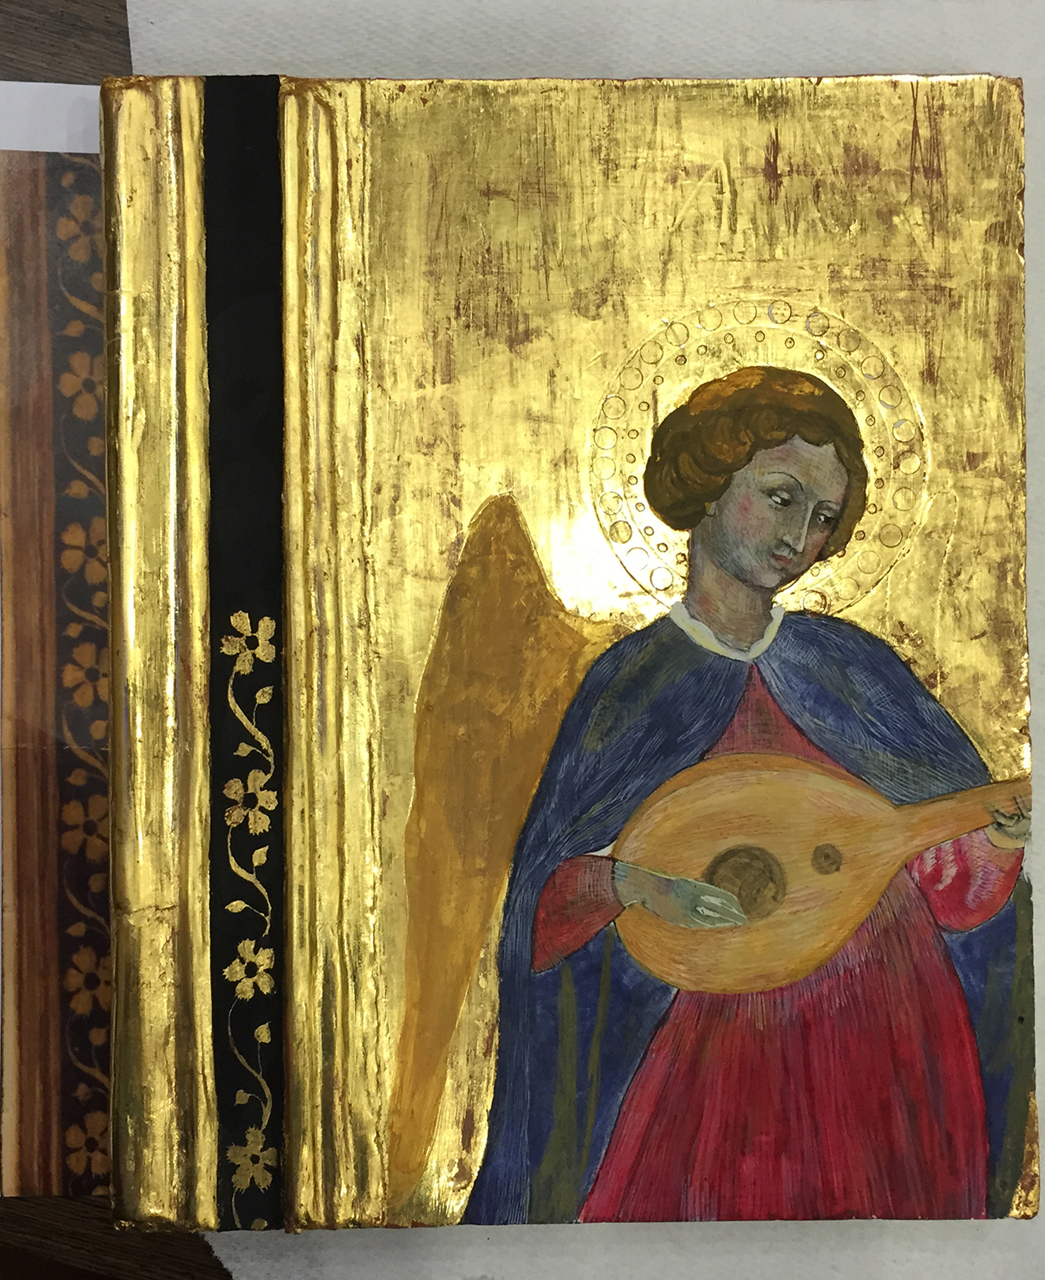
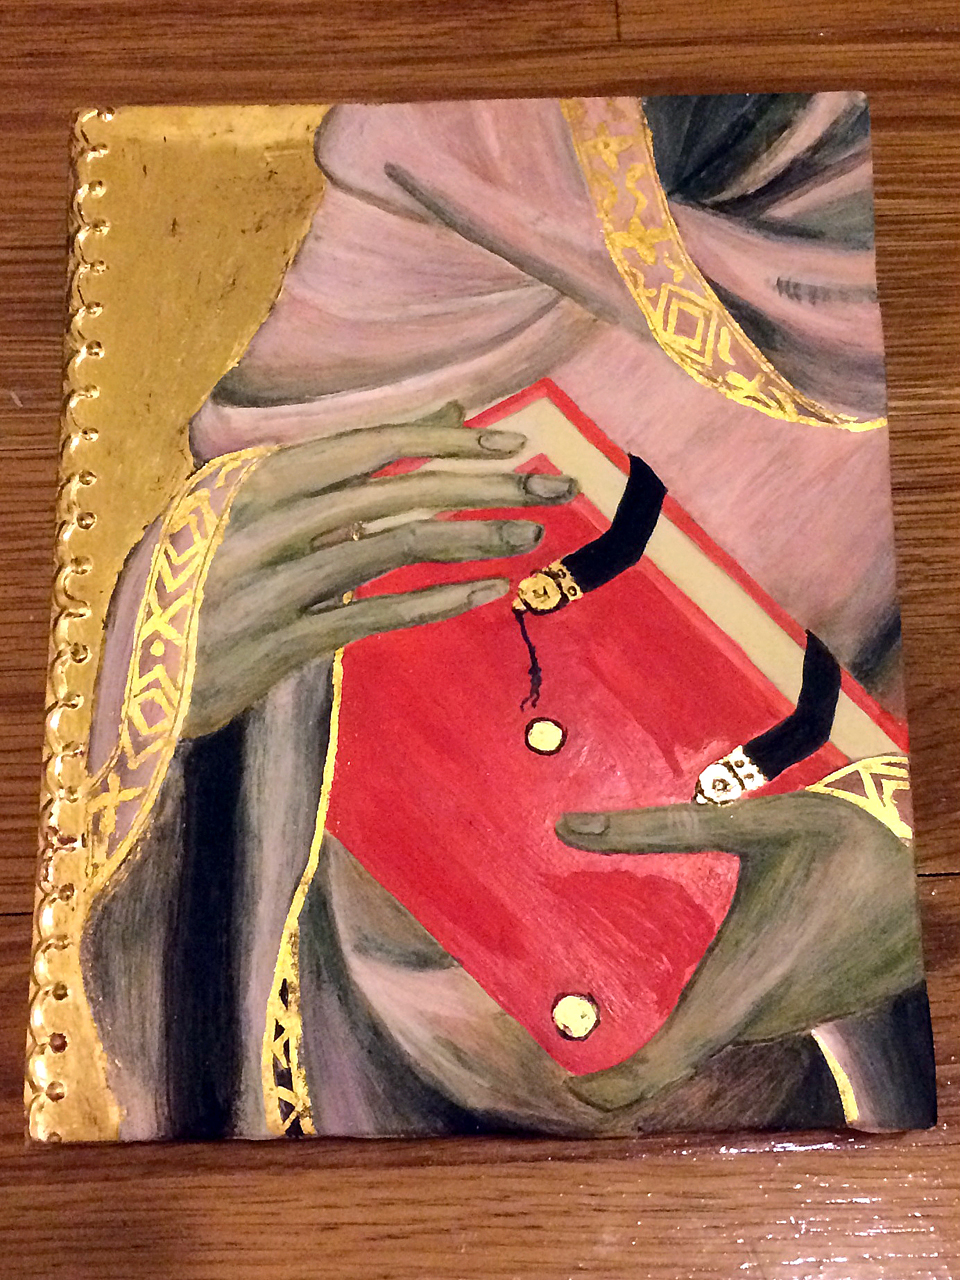
Panel painting after Carlo Crivelli’s Pieta, 1476, by Sarah Mastrangelo.
Technology & Structure is a required course for first-year students at the Conservation Center. The course is reputedly one of the “juiciest” classes students will take during their training, and has thus far not failed to deliver. In the Fall of 2014, our class learned how to make panel paintings using historical methods and tools. Alan Miller, Associate Conservator at the Metropolitan Museum of Art, led us through the process. Following the recipes of Cennino Cennini, as described in his Il Libro dell’Arte, we set out to replicate details of early Italian masterpieces found in the collection at the Metropolitan Museum of Art.
Preparing the Panel
The wood used as a support in panel painting is typically poplar, linden, or willow, depending upon the availability. A thoroughly dry “flat” of poplar (we used American Poplar, which is denser than European Poplar) was sanded lightly in order to knock off any splints. Using a fresh batch of 5% w/v gelatin solution, we coated the panel on all sides. According to Cennini, “[the first size] is a means of giving the wood a taste for receiving the coats of size and gesso.” After the gelatin layer dried, the surface was lightly sanded. The panel was then sized a second and third time using 10% w/v Rabbit Skin Glue (RSG) with an ample amount of drying time and light sanding in between layers. A canvas layer was applied to the panel by soaking a piece of open weave (gauze) cut to size in RSG, and was left to dry overnight.

Rabbit skin glue preparation.

Students applying linen support to poplar.
Done properly, making gesso is a time consuming process. First, we prepared RSG, then slowly added sifted calcium sulfate-carbonate or Bologna Chalk while stirring. The thickness of the gesso depends on the concentration of chalk. The gesso should be prepared the night before it is used.
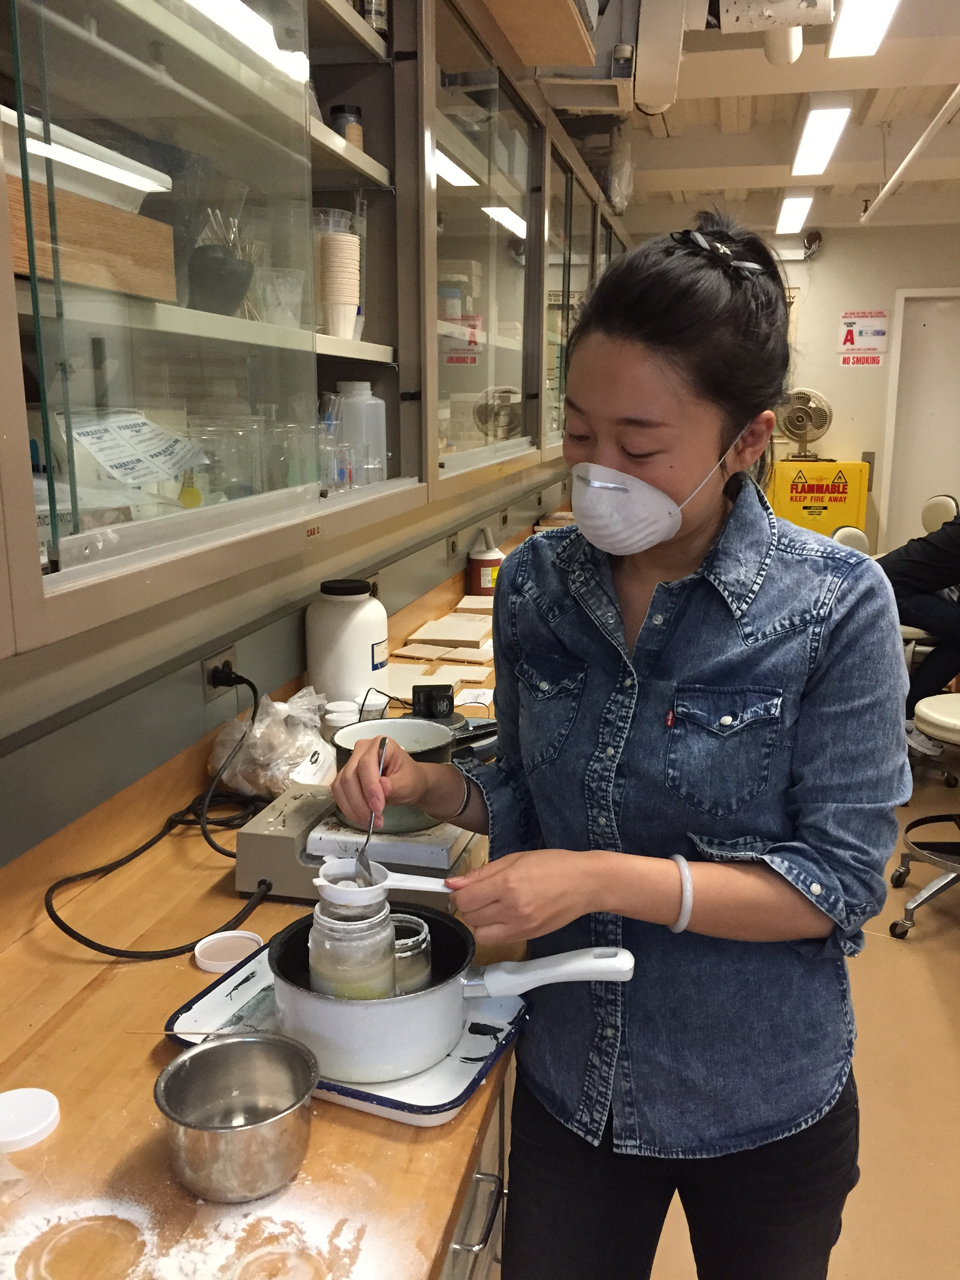
Making the gesso.
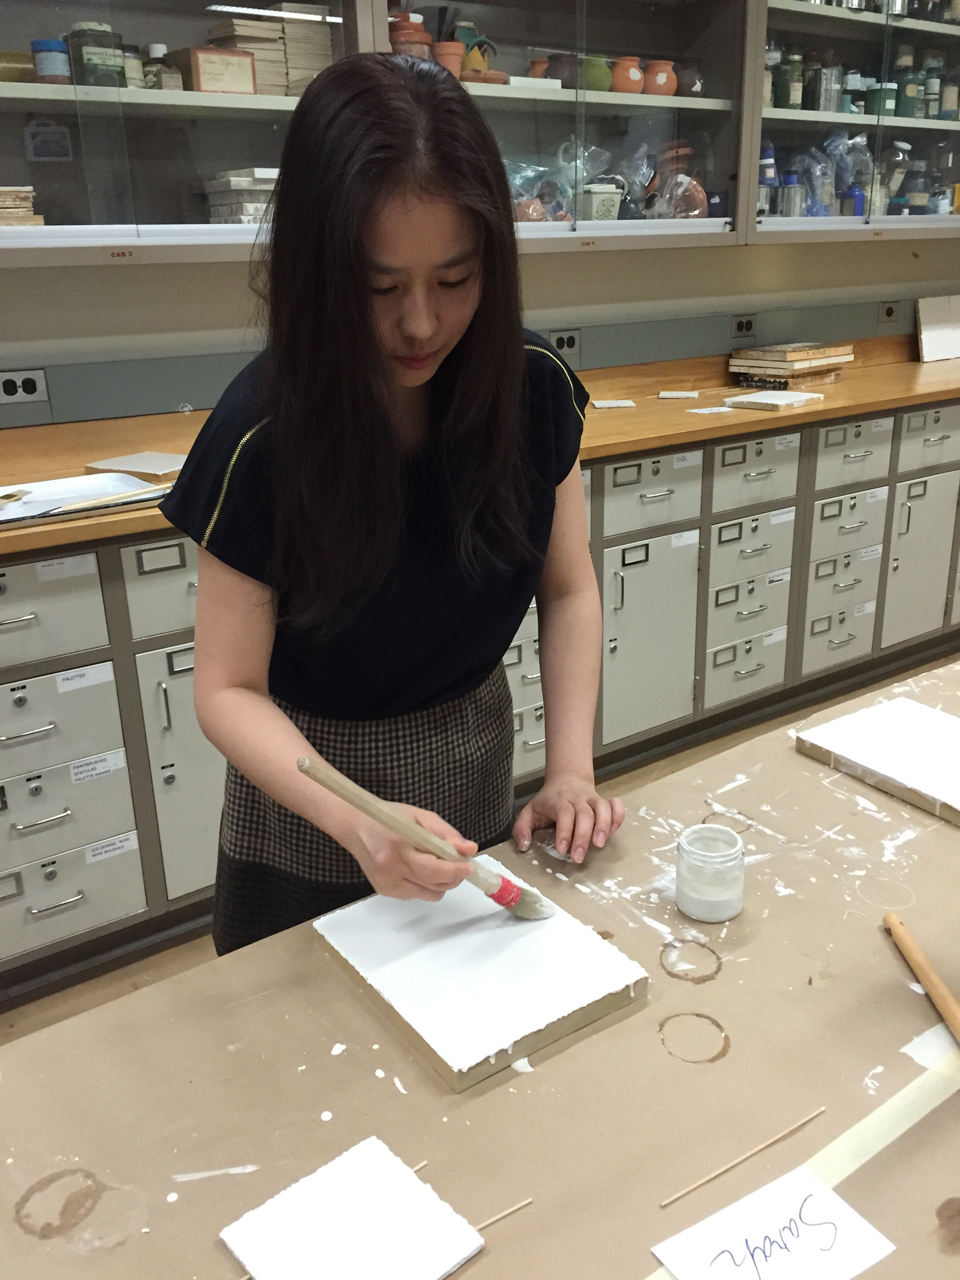
Applying the gesso.
Applying the gesso is a continuous process, building up one layer at a time — up to 7-8 layers — over the course of a day. Each is dried until it is cool to the touch, permitting cohesion between successive layers. The process uses a lot of gesso — we found ourselves running out and having to make more!
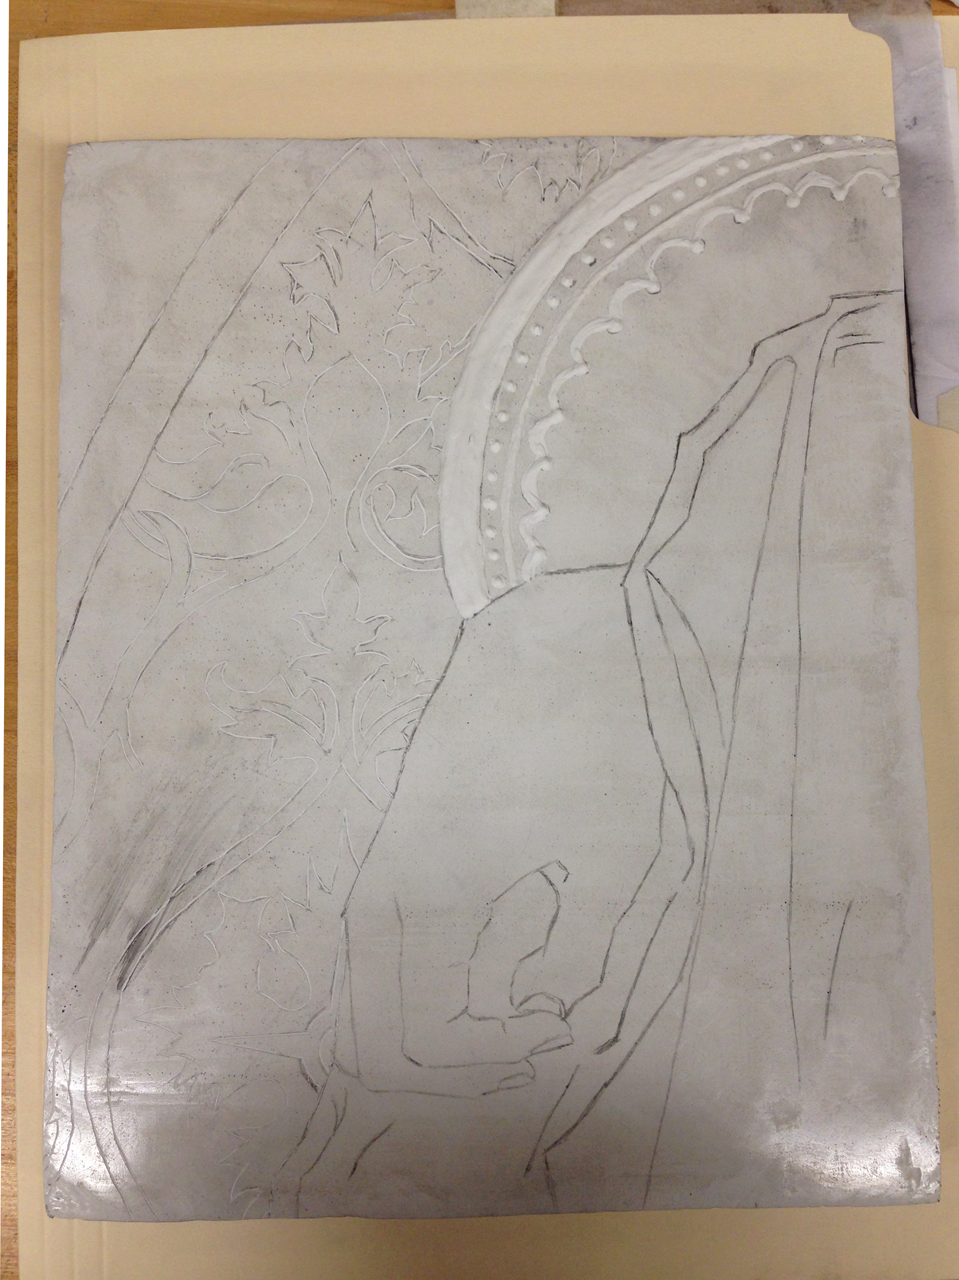
Once the panel is dry, it is planed to a smooth mirror finish using metal scrapers. The scraping process is time consuming. Artisans of the past applied their gesso so masterfully that the required smoothing process was minimal. We, on the other hand, found ourselves breaking a sweat to achieve the perfect surface. Once we obtained as close to a mirror finish as possible within our time constraints, we transferred our chosen design to the panel using transparent paper and charcoal.
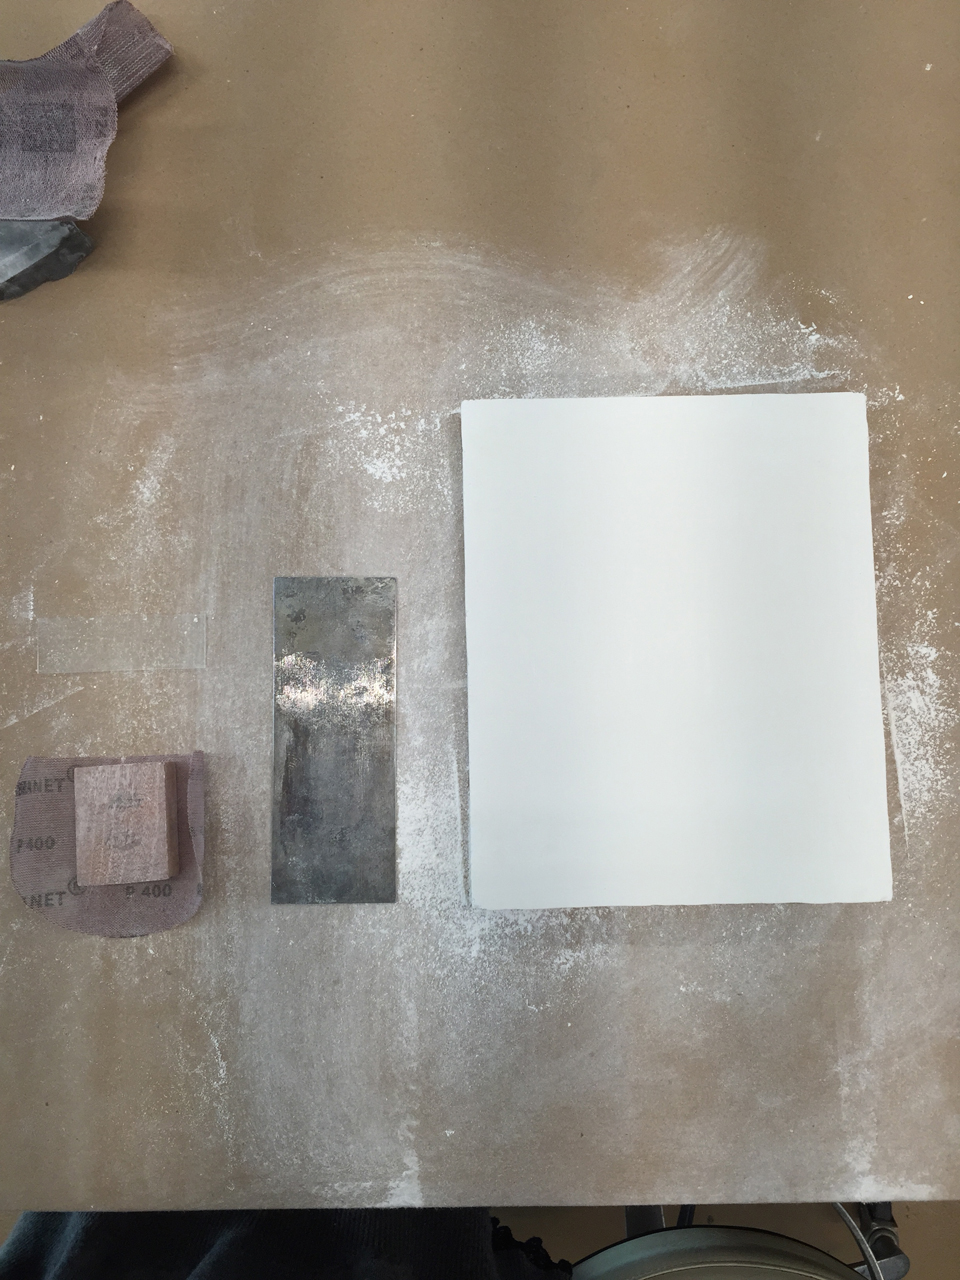
Sandpaper, scraper, panel.

Scraping the panel.
Transferring the Image (Detail from Madonna and Child with Angels by Piero di Domenico da Montepulciano, 1420.)
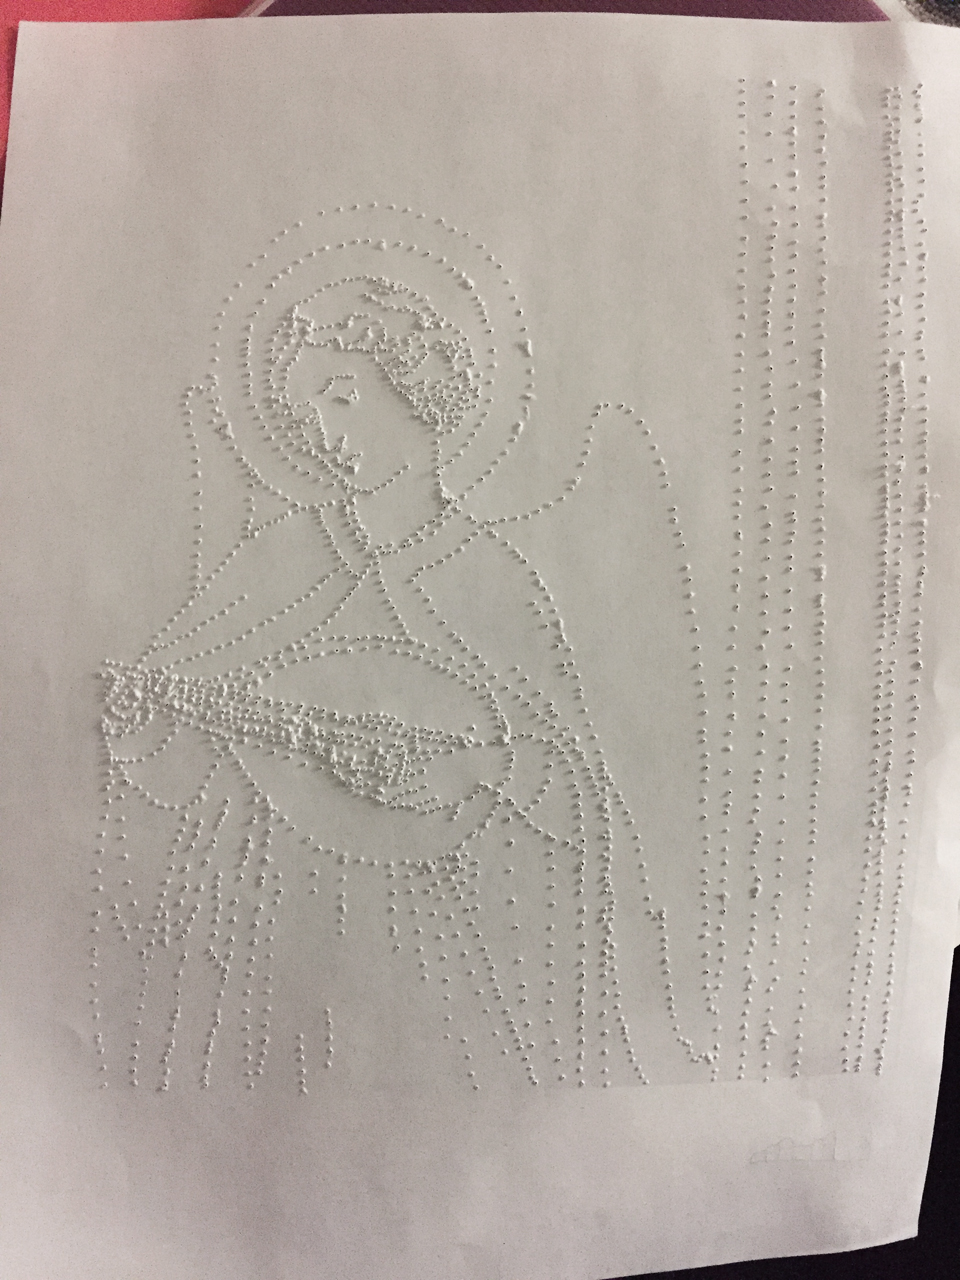
Cartoon with pricked holes along the outline of the image.

Pouncing a silk pouch with charcoal powder against the paper laid onto the gesso ground.
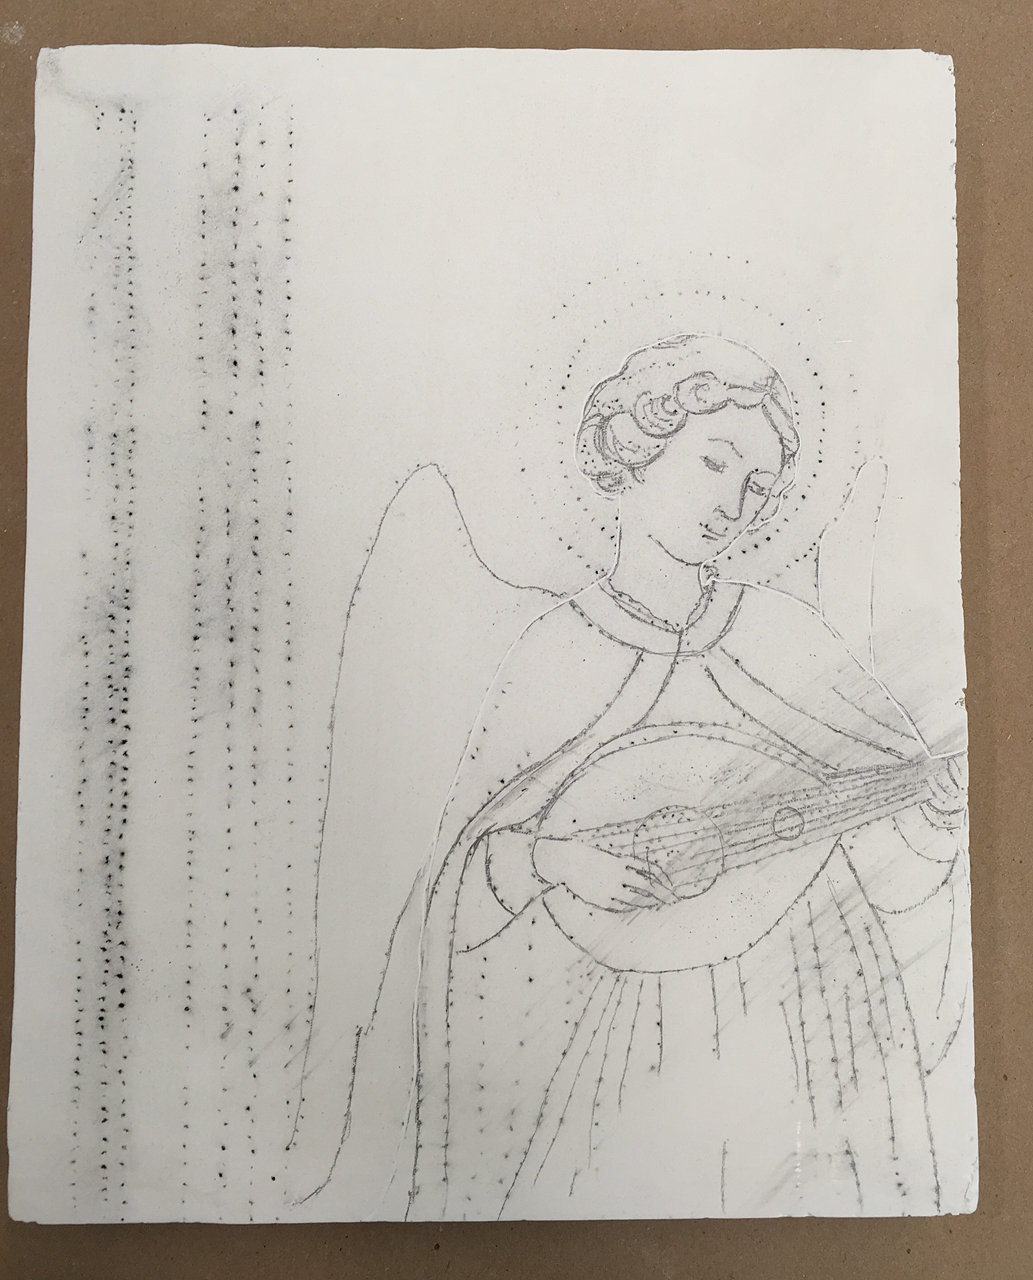
Charcoal dots transferred on the gesso ground. Final composition needs to be outlined with non-friable medium.
Panel Painting Techniques
The goal of our panel project was to use the following techniques:
1 – Pastiglia (gesso painted onto the surface to create a low relief design under gilding)
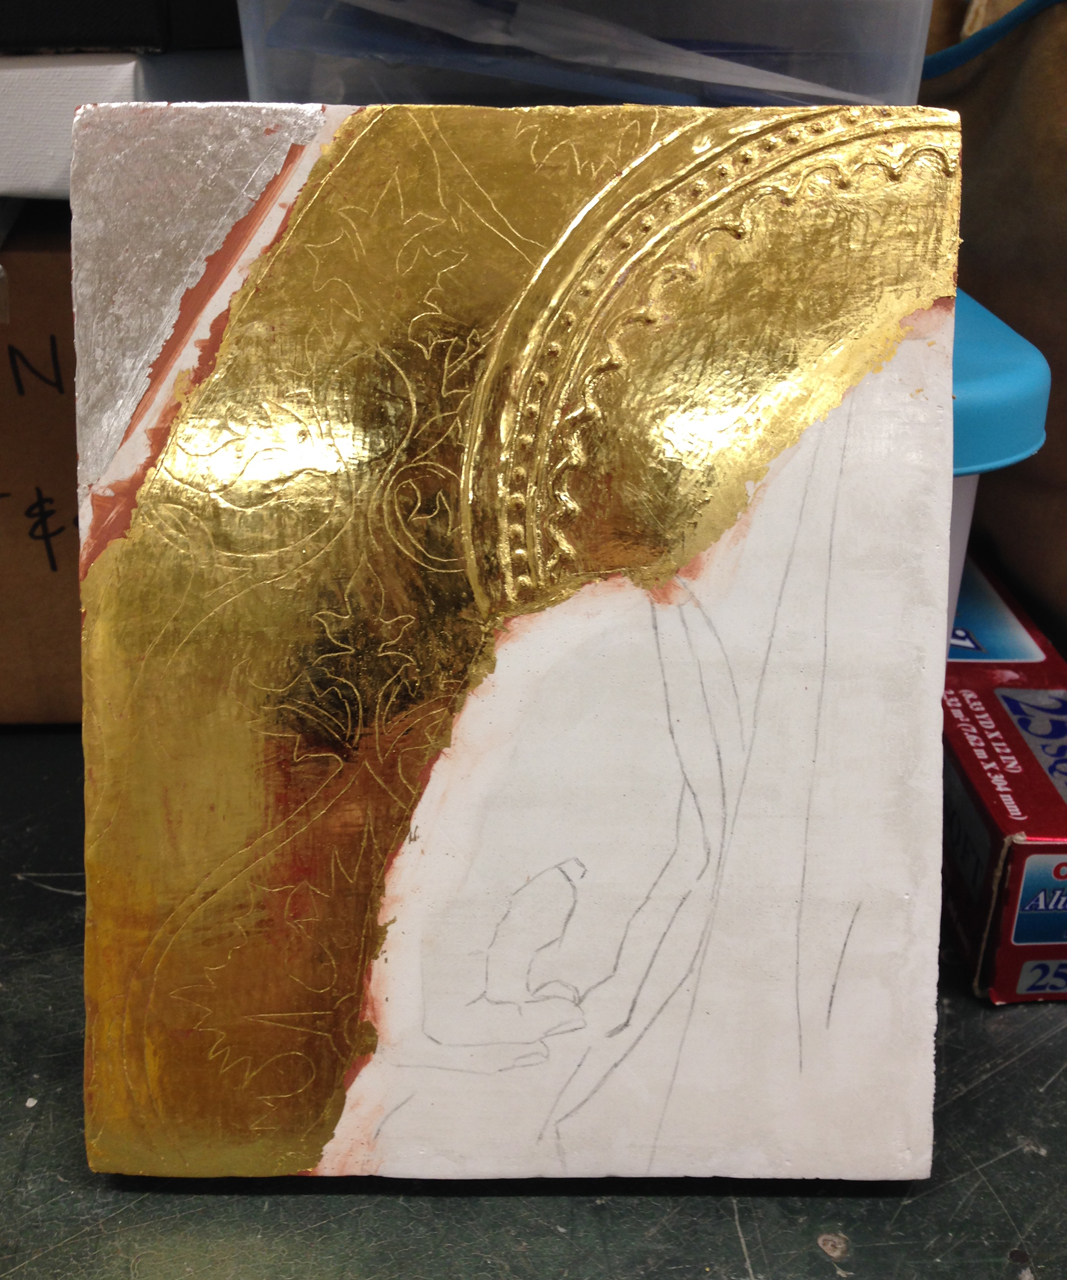
2 – Gilding using bole
3 – Mordant gilding
4 – Punchwork
5 – Flesh painting
6 – Drapery painting
7 – Sgraffito (using a pointed tool to scratch through paint layers to reveal the gilding underneath
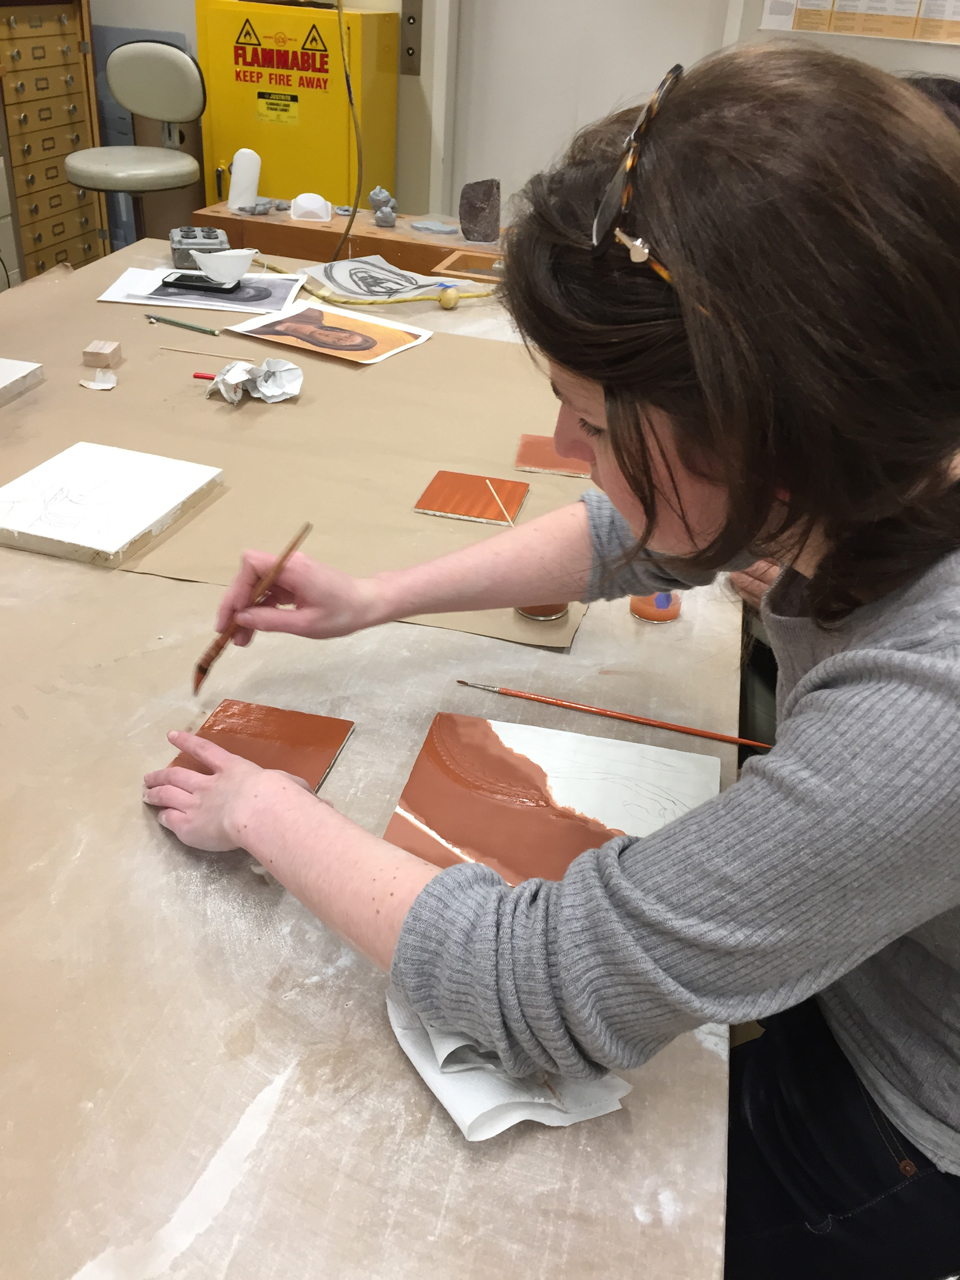
Warmed bole applied in thin layers to areas to be gilded.
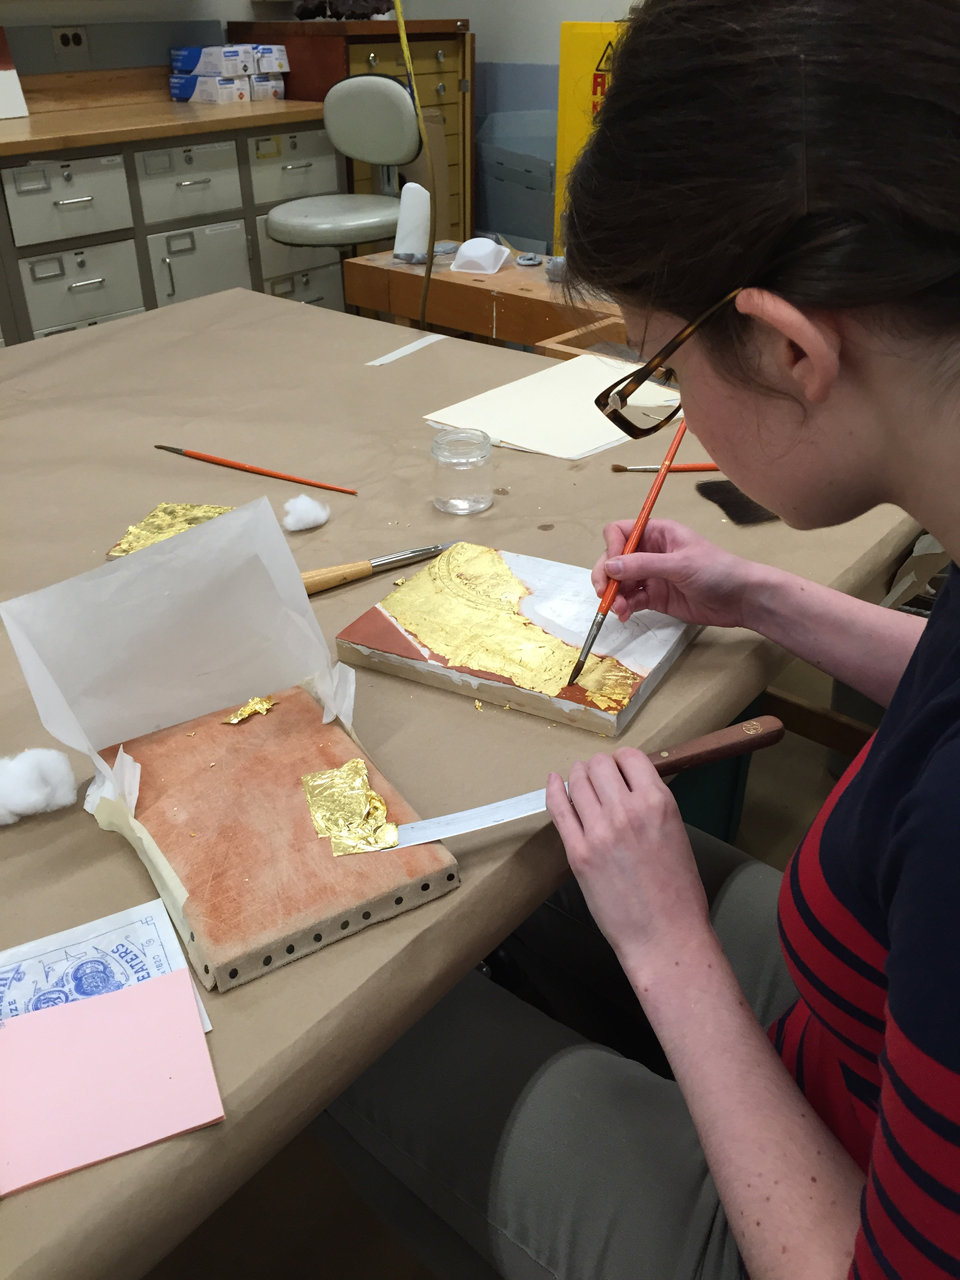
Water gilding: gold leaf cut into small squares and applied to wetted bole using gilding knife or gilding tips. It is then burnished using an agate burnishing tool.
Sgraffito along the left side. Detail from Madonna and Child with Angels by Pietro do Domenico da Montepulciano, 1420.
Mordant gilding was used on the edges of the robe as well as details on the book. Detail from Saint Andrew by Simone Martini, 1326.
The halo was made using pastiglia. Detail of Carlo Crivelli’s Pietà,1476.
The bole is applied over the smooth and raised gesso. Gold is applied over the entire area. Detail of Carlo Crivelli’s Pietà,1476.
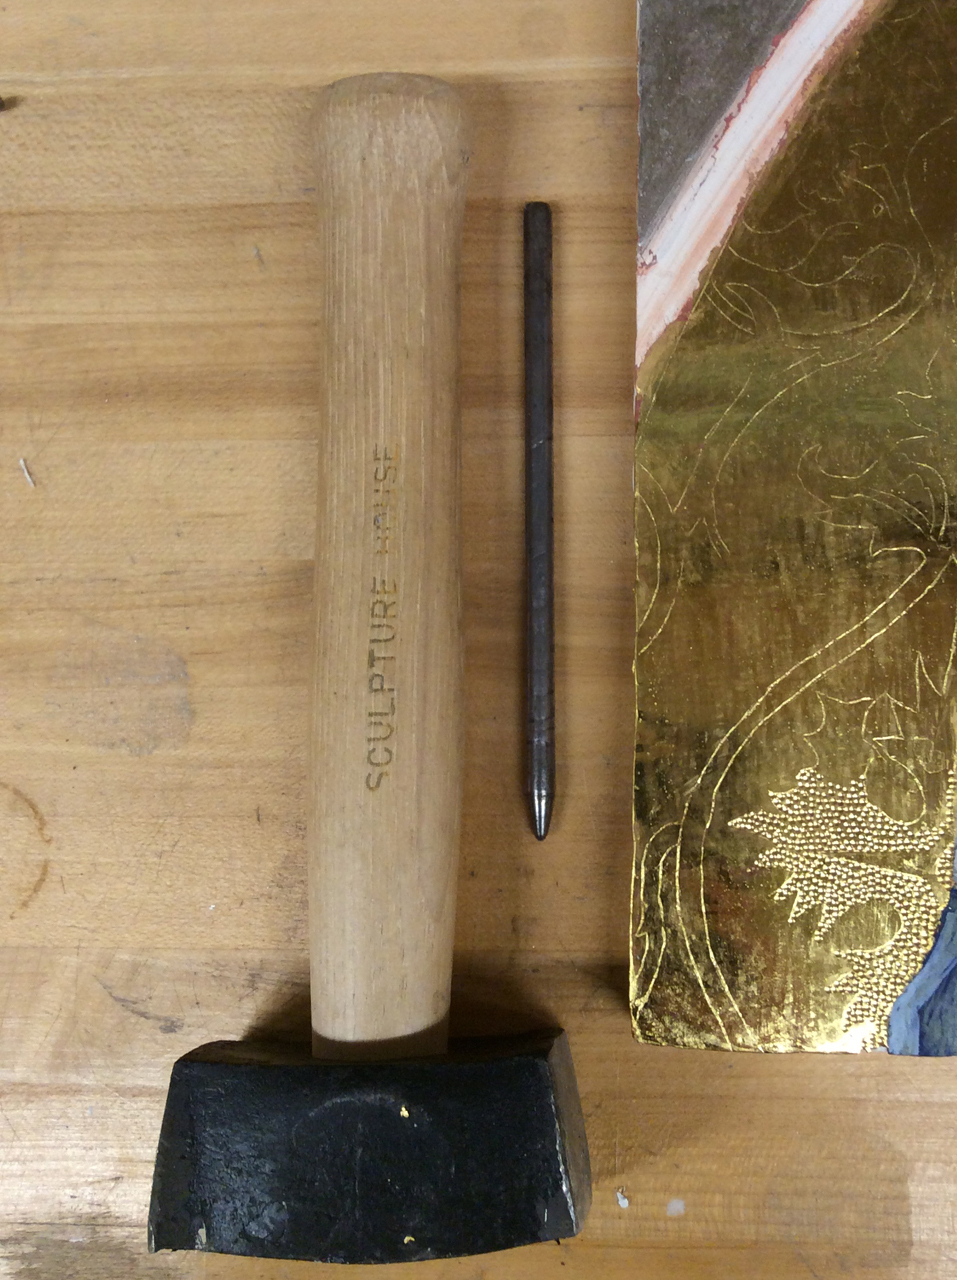
Punchwork tools

Punchwork
Egg tempera is made by mixing egg yolk with pigment. The pigment must be ground very finely in water before tempering it with the yolk. The process of applying the egg tempera is different than that of oil because the paint dries very quickly and doesn’t blend easily. As such, the paint is applied in thin short strokes in overlapping colors to produce a range of hues.
As we found out over the course of painting, the fineness of the pigment particles, and the size and quality of the brush have an impact on the handling of the paint.
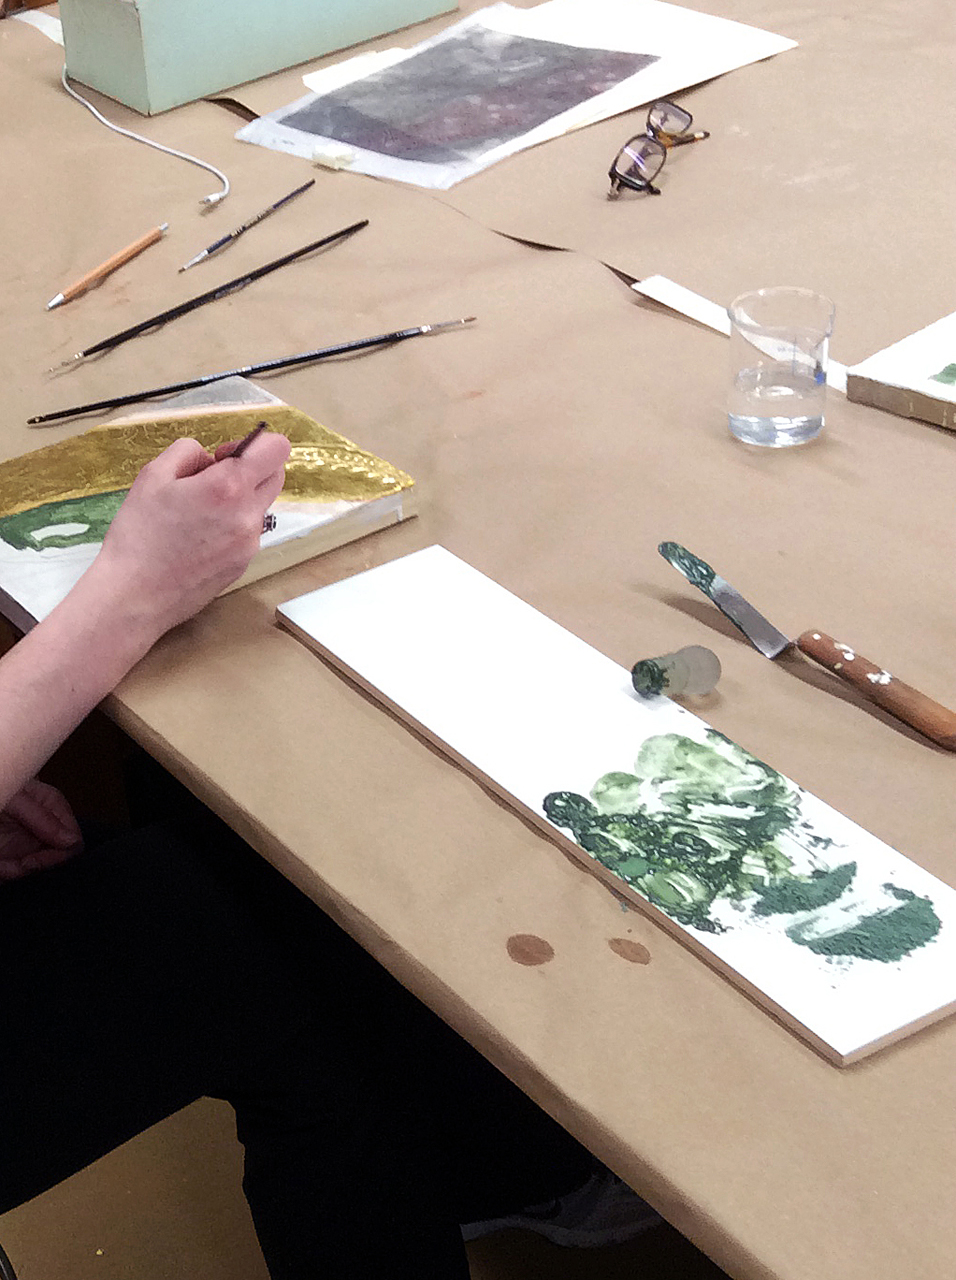
Mixing egg yolk and pigment. Medieval painters used green earth to underpaint light-colored flesh tones, and verdaccio, a mixture of black, yellow ochre, lime white, and cinnabar, for shadows.
Finished detail of Carlo Crivelli’s Pietà,1476
If this process taught us anything, it is an appreciation for the patience and tremendous skill required by early artists to make such exquisite works. The act of applying gesso and scraping it to a smooth finish is an art form unto itself!
For an in-depth and historically accurate guide to producing panel paintings, Jo Kirby’s Art in Making: Italian Painting Before 1400 published by the National Gallery of Art in London is an excellent source.